
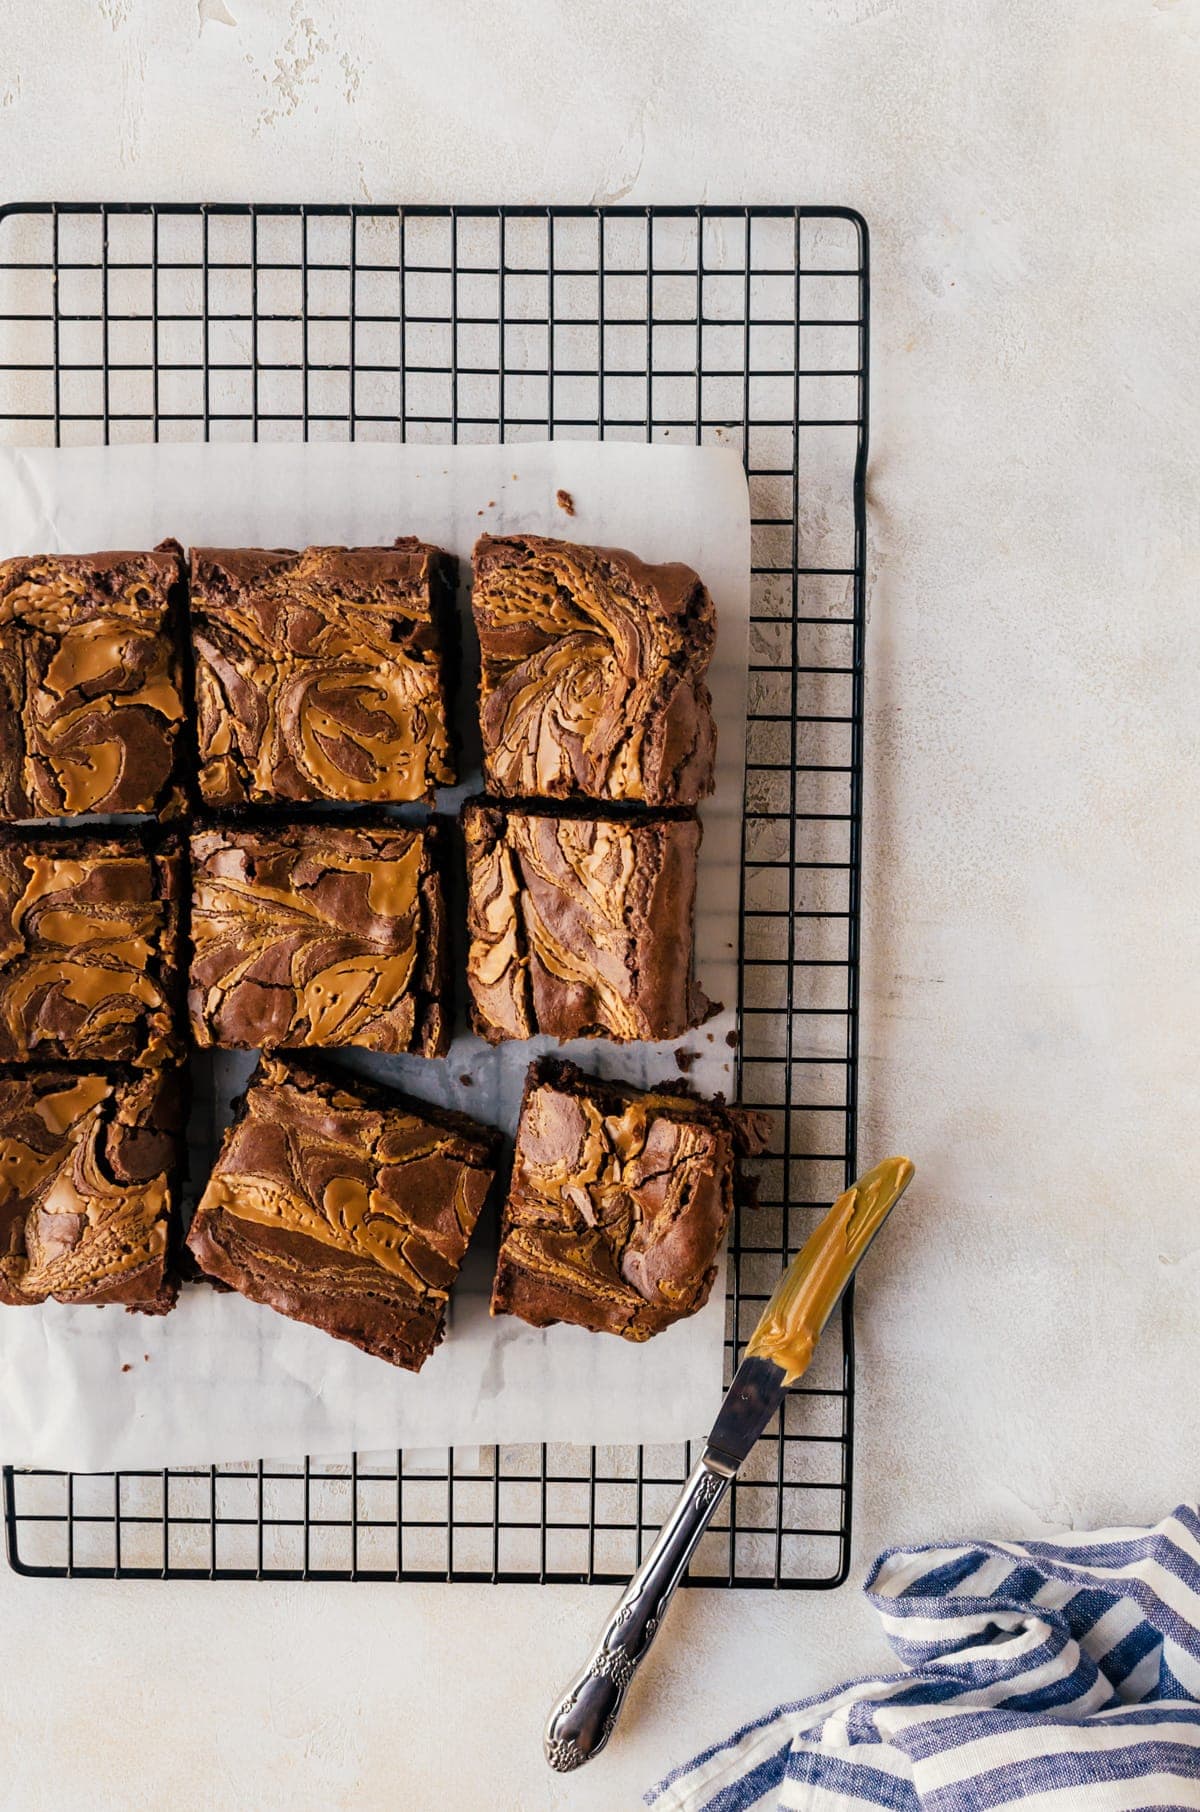
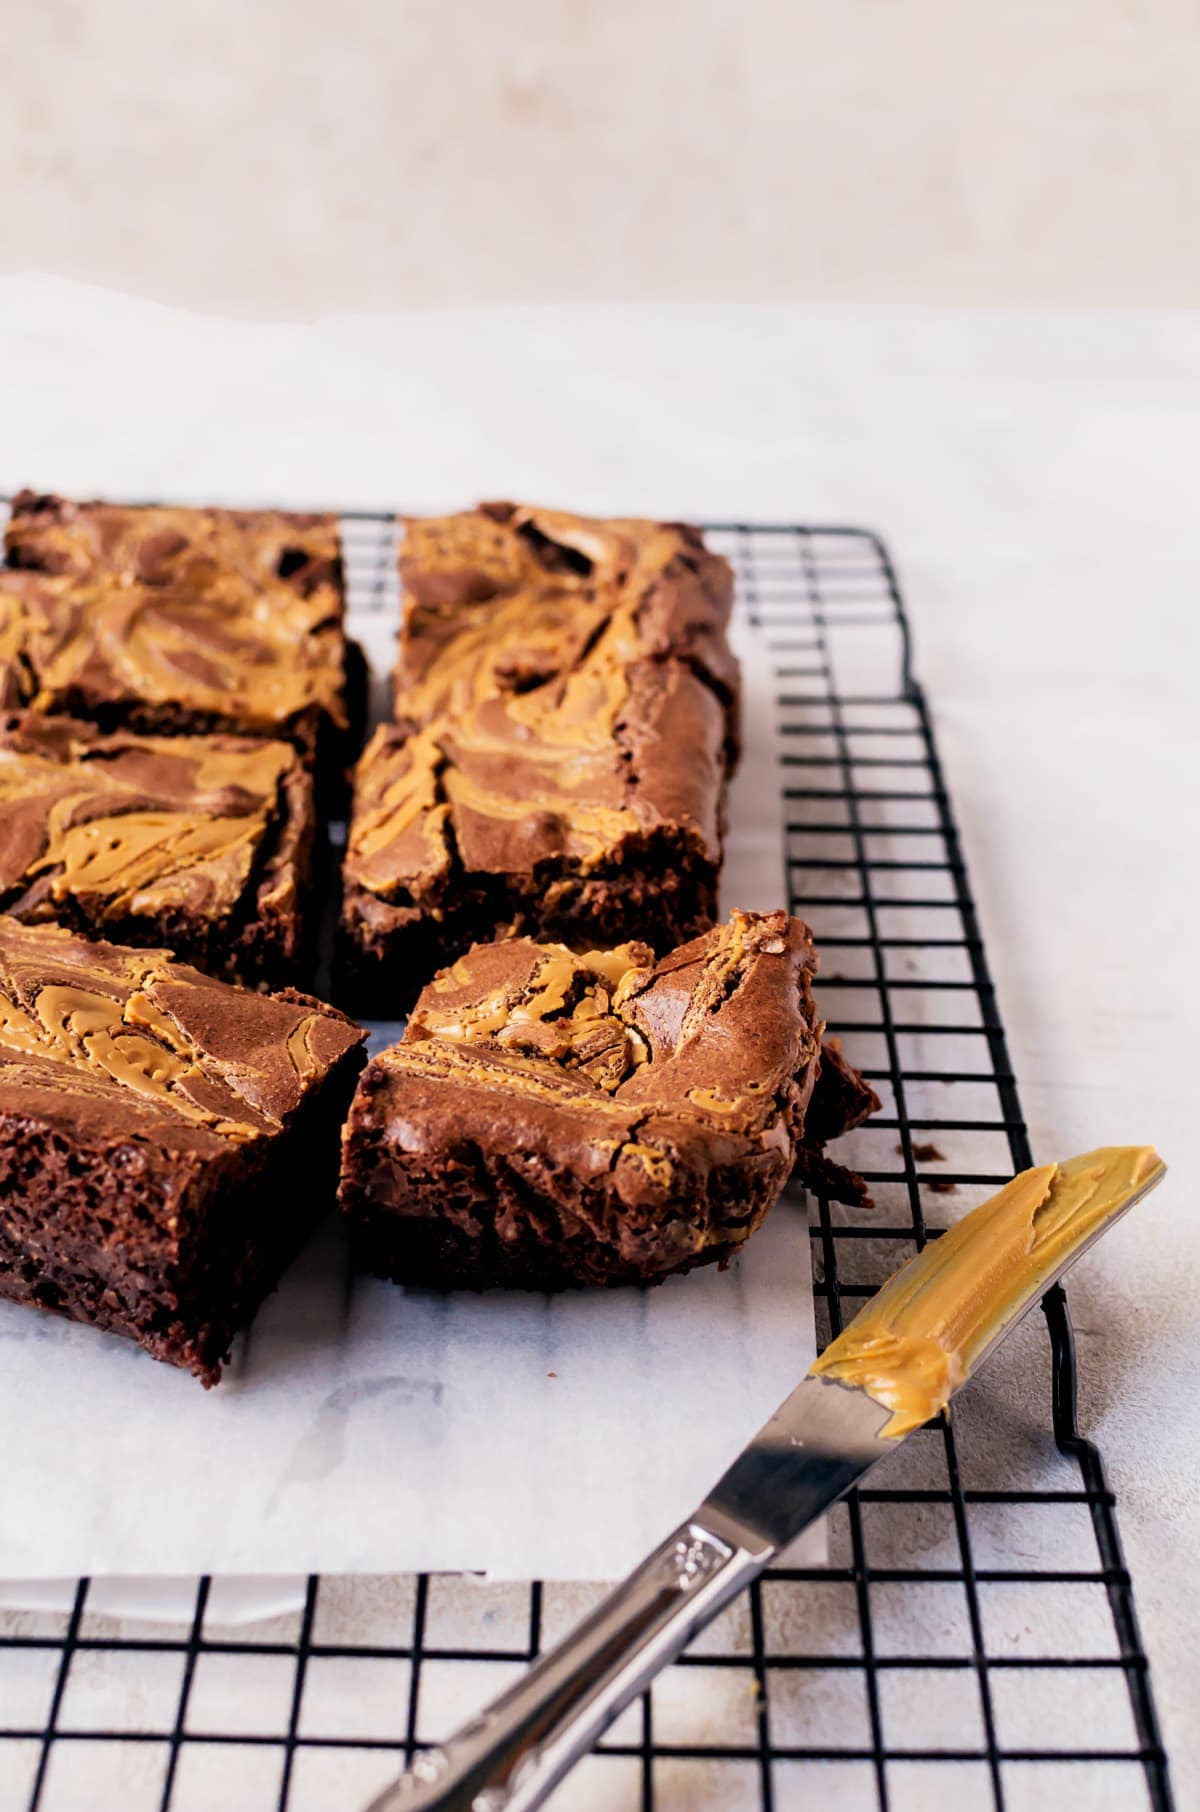
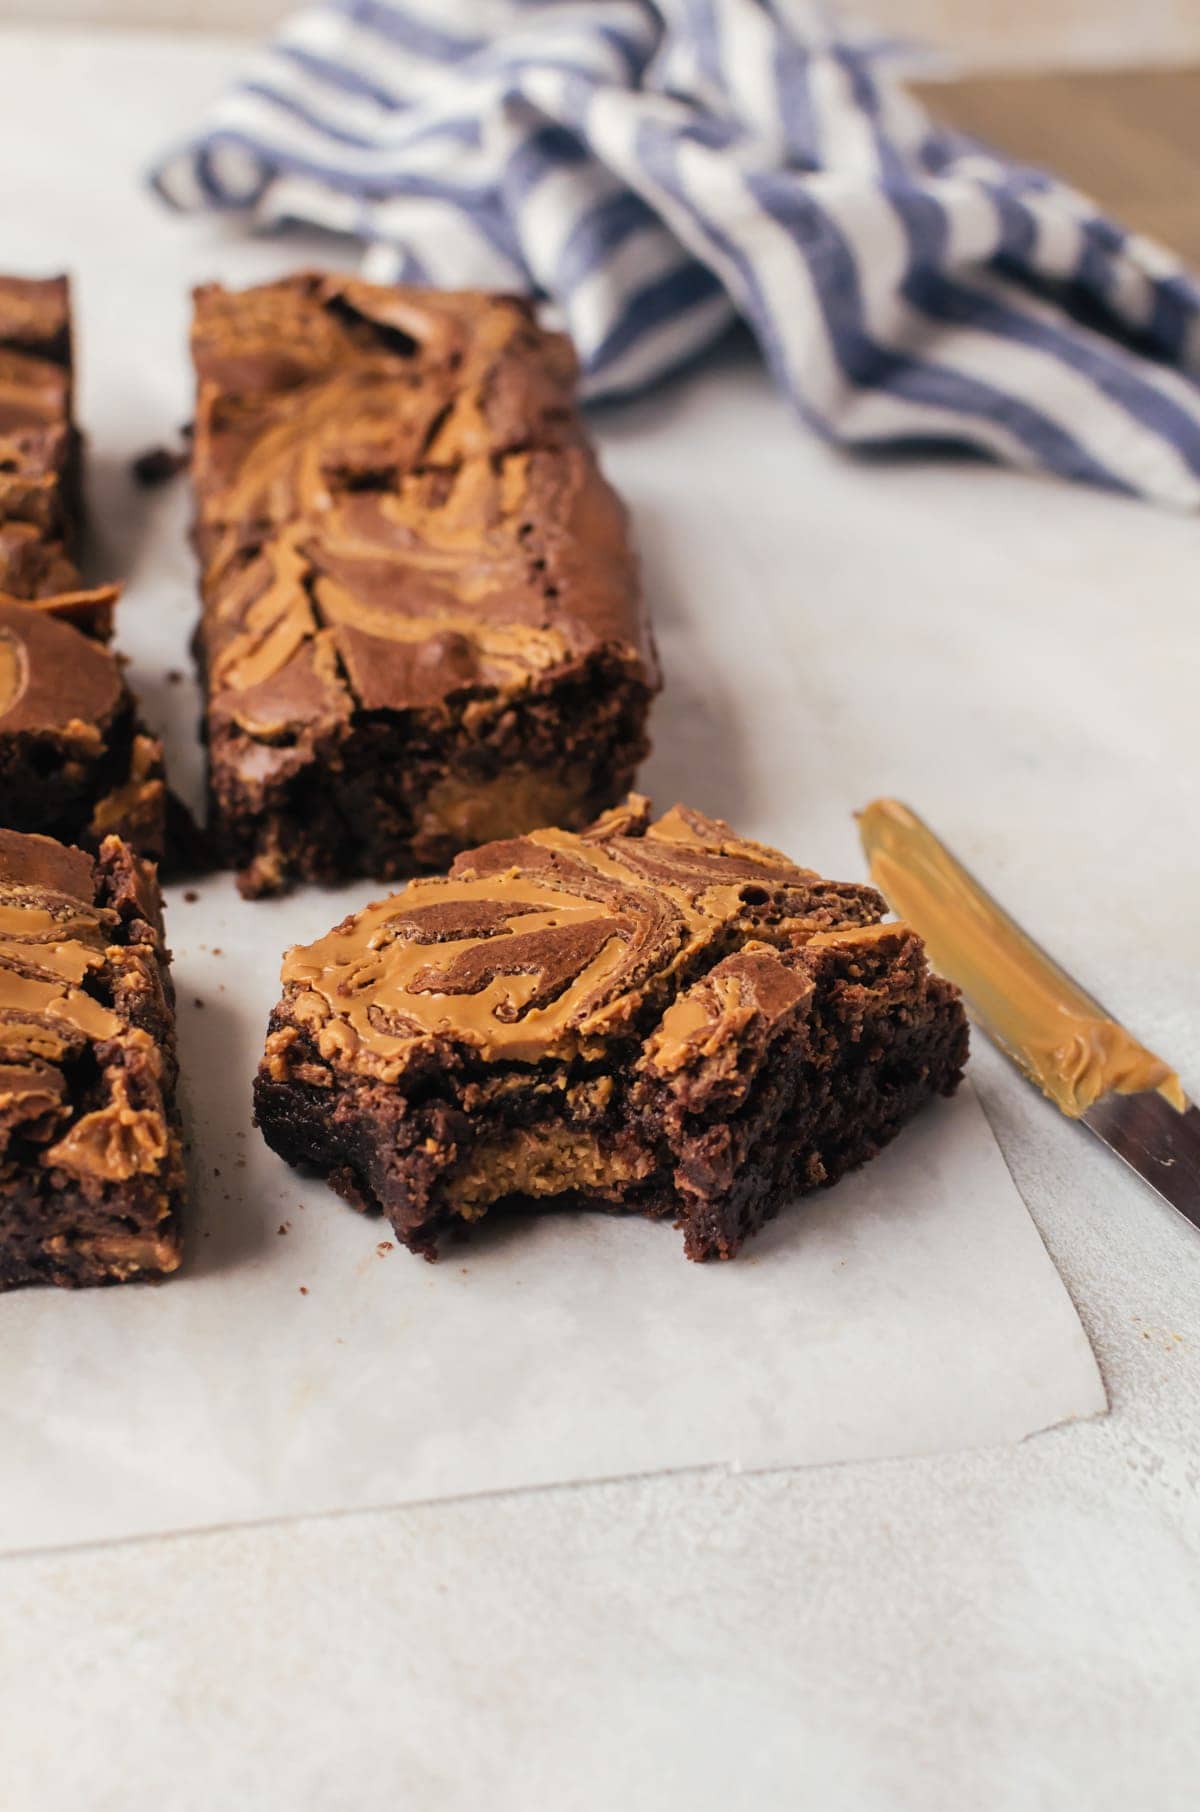
These peanut butter brownies have rich, fudgy chocolate centers, chewy edges, and beautiful swirls of creamy peanut butter across the top. I love breaking into one and getting that combination of deep chocolate and slightly salty peanut butter in the same bite. Add a few mini peanut butter cups, and it’s almost like eating your favorite peanut butter candy in brownie form!
Why You’ll Love These Peanut Butter Brownies
Chocolate and peanut butter are such a good combination, especially when the brownie is rich enough to balance all that peanut butter flavor.
- Thick, fudgy brownies. Melted chocolate and cocoa powder create a deep chocolate flavor, while the butter and eggs give the brownies their rich texture.
- Peanut butter in every bite. Dollops of creamy peanut butter are swirled through the top so you get distinct ribbons of peanut butter and chocolate.
- Optional peanut butter cups. I love adding mini peanut butter cups to the batter for an extra little surprise, but the brownies are delicious without them.
- No stand mixer required. The brownie batter comes together in a saucepan with a whisk and a spatula.
- Perfect for sharing. These are wonderfully rich, so even a small square is satisfying. They’re great for parties, cookie boxes, or whenever you’re craving chocolate and peanut butter.
This recipe is a variation of my homemade brownies, with a few changes to the ingredients to accommodate the peanut butter. For an equally fudgy version without the swirl, try my fudge brownies. If you want a candy-coated chocolate version, my M&M brownies are another favorite.
Ingredient Overview
You only need a handful of ingredients to make these brownies, but there are a few details worth knowing before you get started. You’ll find the exact measurements in the recipe card below.
- Chocolate: I recommend chopped semisweet or dark chocolate bars for melting into the brownie batter. I like Lindt, Green & Black’s, or Ghirardelli. Using good-quality chocolate makes a noticeable difference because it’s such a prominent flavor in these brownies.
- Cocoa powder: You can use natural unsweetened or Dutch-processed cocoa powder. I personally like the flavor of natural cocoa powder alongside the peanut butter, but both work in this recipe.
- Creamy peanut butter: I recommend a smooth, no-stir peanut butter such as Jif. Natural peanut butter that separates can have an inconsistent oil balance, which can affect how the swirl holds together during baking.
- Unsalted butter: Melted butter gives these brownies their rich flavor and tender texture. There’s no need to soften it first because you’ll be melting it with the chocolate.
- Granulated and brown sugar: I use both for sweetness and texture. The brown sugar contributes moisture and a subtle molasses flavor, while granulated sugar helps create that classic brownie crust.
- Eggs: Four large eggs help give these thick brownies their structure. Bring them to room temperature so they incorporate evenly into the chocolate mixture.
- All-purpose flour: Measure carefully. Too much flour can turn a fudgy brownie into a drier, cakier one. I prefer weighing it whenever possible.
- Mini peanut butter cups: These are optional, but I love adding them for little pockets of peanut butter and chocolate. You can leave them out without changing the basic brownie recipe.
How to Make Peanut Butter Brownies
These brownies come together in just a few steps. The main thing to remember is to mix the chocolate batter thoroughly before adding the flour, then be gentle when creating the peanut butter swirl.
- Prepare your pan. Preheat the oven to 350°F and line an 8×8-inch baking pan with parchment paper or aluminum foil. Leave some overhang so you can lift the brownies out once they’ve cooled.
- Melt the chocolate, butter, and sugars. Add the butter, chopped chocolate, granulated sugar, and brown sugar to a saucepan over medium heat. Stir frequently until the butter and chocolate are mostly melted. Remove the pan from the heat and continue stirring until smooth.
- Cool slightly and add the eggs. Let the chocolate mixture cool a little before adding the eggs and vanilla. Whisk vigorously for about 2–3 minutes until everything is thoroughly combined.
- Add the dry ingredients. Stir in the flour, cocoa powder, and salt until no streaks of flour remain. Stop mixing once everything is incorporated.
- Fill the pan. Spread the brownie batter evenly into your prepared pan. If you’re using mini peanut butter cups, gently press them into the batter.
- Add the peanut butter swirl. Drop spoonfuls of creamy peanut butter across the surface. Use the tip of a butter knife or skewer to create gentle swirls through the brownie batter. Stop while you can still see distinct ribbons of peanut butter.
- Bake. Bake for approximately 30–35 minutes, although the brownies may need up to 40 minutes. The edges should be set, and a toothpick inserted into the brownie portion near the center should come out with thick, moist crumbs but no raw batter. If the peanut butter starts browning too quickly, loosely cover the pan with aluminum foil.
- Cool completely. Allow the brownies to cool in the pan before lifting them out and slicing. This gives the fudgy center time to set and helps you cut cleaner squares.
Amanda’s Expert Baking Tips
Getting that perfect chocolate and peanut butter combination isn’t difficult, but a few small details make a big difference.
- Use smooth, no-stir peanut butter. This is especially important for the swirl. Natural peanut butter can separate and release more oil, which may affect the appearance and texture.
- Don’t scorch the chocolate. Remove the saucepan from the heat while a few small pieces of chocolate remain. The residual heat should finish melting them as you stir.
- Let the chocolate cool slightly before adding the eggs. You don’t want to accidentally cook the eggs in a mixture that’s too hot.
- Whisk the eggs thoroughly. This helps them combine evenly with the chocolate and sugar mixture and encourages that delicate brownie crust.
- Avoid overmixing once the flour is added. Stir gently and stop when the flour disappears. Overmixing develops gluten and can make the brownies tougher.
- Keep the peanut butter swirl simple. Use just a few passes with a butter knife or skewer. If you swirl too much, the peanut butter blends into the chocolate batter rather than creating those pretty ribbons.
- Watch the peanut butter as the brownies bake. If the top is browning before the center is ready, cover the pan loosely with foil and continue baking.
- Don’t wait for a completely clean toothpick. You want thick, moist brownie crumbs, not wet batter. Be careful to test the brownie rather than a pocket of peanut butter or melted candy.
- Cool before cutting. I know it’s tempting to cut into them right away, but these brownies firm up as they cool. For particularly neat slices, wipe your knife between cuts.
Peanut Butter Brownie Variations
I love this recipe exactly as it is, but there are a few simple ways to adjust it depending on what you’re craving.
- Add peanut butter cups. Use the optional mini peanut butter cups for extra chocolate and peanut butter throughout the brownies.
- Use a different chocolate. Semisweet and dark chocolate both work, so you can choose how intense you want the chocolate flavor.
- Finish with flaky salt. A light sprinkle over the cooled brownies is a nice contrast to the sweetness.
- Serve with ice cream. A scoop of homemade vanilla ice cream turns one of these brownies into an especially good dessert.
For another peanut butter-and-chocolate treat with a little crunch, try my monster cookie bars.
Storing and Freezing Peanut Butter Brownies
These brownies are easy to make ahead for parties, holiday dessert boxes, or whenever you want to have a chocolate treat ready.
- Room temperature: Store the cooled brownies in an airtight container for up to four days.
- Freezer: Allow the brownies to cool completely, then place them in a freezer-safe airtight container with parchment paper between the layers. For the best texture, I suggest using them within two months.
- Thawing: Thaw the brownies overnight in the refrigerator, then let them come to room temperature before serving if you prefer a softer, fudgier texture.
Recipe FAQs
I recommend a smooth, no-stir peanut butter such as Jif. It holds its texture better for swirling. Natural peanut butter that separates can be too oily and may affect how the swirl sets during baking.
Add small dollops of peanut butter across the batter, then drag a butter knife or skewer through them only a few times. You want to create ribbons, not completely mix the peanut butter into the brownie batter.
Look for set edges and a center that no longer appears wet or raw. Insert a toothpick into the brownie portion near the center, avoiding the peanut butter and any candy. A few thick, moist crumbs are exactly what you’re looking for. The brownies will finish setting as they cool.
I recommend a light-colored metal 8×8-inch pan. Dark metal pans can brown the edges faster, and glass or ceramic pans can change the baking time. If you’re using a different pan material, check the brownies carefully rather than relying on the exact baking time.
Yes. The original recipe is written for an 8×8-inch pan. For a 9×13-inch pan, multiply the ingredients by 1.5×. The brownies will be a little thinner, so check for set edges and thick, moist crumbs rather than relying on the original baking time.
Yes! Let them cool completely, then freeze in an airtight container with parchment paper between layers to prevent sticking. For the best texture, use within two months. Thaw overnight in the refrigerator before serving.
Absolutely. The mini peanut butter cups are optional. You’ll still have a rich chocolate brownie with plenty of peanut butter flavor from the swirl.

Recipe Card

Peanut butter brownies
Ingredients
- 1 cup unsalted butter room temperature, preferred
- 5 ounces chopped chocolate
- 1 cup granulated sugar
- ⅔ cup brown sugar
- 4 large eggs room temperature
- 2 teaspoons vanilla extract
- 1 cup all-purpose flour
- ⅓ cup cocoa powder
- ½ teaspoon sea salt
- 12 mini peanut butter cups optional
- ½ cup creamy peanut butter

Instructions
- Prepare the oven and baking pan. Preheat the oven to 350°F (175°C). Line an 8 × 8-inch baking pan with parchment paper or aluminum foil, leaving enough overhang to lift out the finished brownies. I recommend a light-colored metal pan for more predictable results.
- Melt the butter, chocolate, and sugars. Add the unsalted butter, chopped chocolate, granulated sugar, and brown sugar to a saucepan over medium heat. Stir constantly until the butter and chocolate are mostly melted.
- Finish melting off the heat. Remove the saucepan from the heat and continue stirring until the remaining chocolate has melted completely and the mixture is smooth. Set aside to cool slightly so it isn't hot enough to cook the eggs.
- Add the eggs and vanilla. Add the room-temperature eggs and vanilla extract to the slightly cooled chocolate mixture. Whisk vigorously for approximately 2–3 minutes, until the eggs are thoroughly incorporated and the mixture is well combined.
- Incorporate the dry ingredients. Add the all-purpose flour, cocoa powder, and sea salt to the chocolate mixture. Stir gently until just combined and no streaks of flour remain. Avoid overmixing to maintain the brownies' fudgy texture.
- Fill the baking pan. Transfer the brownie batter to the prepared pan and spread it evenly into the corners.
- Add the optional peanut butter cups. If using the miniature peanut butter cups, gently press them into the brownie batter so they're distributed throughout the pan. You can omit them without changing the rest of the recipe.
- Add the peanut butter. Drop small spoonfuls of creamy peanut butter evenly across the surface of the brownie batter.
- Create the peanut butter swirl. Use the tip of a butter knife or skewer to gently swirl the peanut butter into the chocolate batter. Make only a few passes, stopping while you can still see distinct ribbons of peanut butter. Don't overmix the swirl, or the peanut butter will blend into the brownie batter instead of creating a visible pattern.
- Bake the brownies. Bake for approximately 30–35 minutes, although they may need up to 40 minutes. The edges should be set, and the center should no longer look wet or raw. Insert a toothpick into the brownie portion near the center, avoiding any peanut butter or candy. It should come out with a few very moist, thick brownie crumbs attached, but no raw batter. If the peanut butter begins browning too quickly before the brownies finish baking, loosely cover the pan with aluminum foil and continue baking.
- Cool the brownies completely. Remove the pan from the oven and allow the brownies to cool completely in the baking pan. The fudgy centers will continue setting as they cool.
- Remove and slice. Once completely cool, use the parchment or foil overhang to lift the brownies out of the pan. Cut into squares, wiping the knife between cuts if needed for cleaner slices.
Notes
-
Use good-quality chocolate. I recommend chopped semisweet or dark chocolate bars for melting into the batter.
-
Use creamy, no-stir peanut butter. I prefer a smooth peanut butter such as Jif. Natural peanut butter that separates can release excess oil and affect the swirl's texture.
-
Measure the dry ingredients carefully. Too much flour or cocoa powder can make the brownies dry. I recommend weighing your ingredients whenever possible.
-
Use room-temperature eggs. Cold eggs can be placed in a bowl of warm water for approximately 5 minutes before cracking.
-
Don't overheat the chocolate. Remove the saucepan from the heat while the chocolate is mostly melted and let the remaining heat finish the job.
-
Whisk thoroughly before adding flour. Beat the eggs into the chocolate mixture for approximately 2–3 minutes, then mix gently once the flour is added.
-
Keep the peanut butter swirl visible. Use only a few passes with a butter knife or skewer. If you swirl too much, the peanut butter will mix into the chocolate batter instead of forming distinct ribbons.
-
Peanut butter cups are optional. The brownies are delicious with just the peanut butter swirl, but miniature peanut butter cups add extra chocolate and peanut butter throughout.
-
Watch the peanut butter while baking. If the topping begins browning too quickly, loosely cover the pan with foil.
-
Test the brownie, not the peanut butter. Insert a toothpick near the center, avoiding any peanut butter or candy. Thick, moist crumbs are the goal; wet batter means the brownies need more time.
-
Cool completely before cutting. The brownies continue setting as they cool. For neat squares, wipe the knife between cuts.
-
Storage: Store completely cooled brownies in an airtight container at room temperature for up to 4 days.
-
Freezing: Freeze cooled brownies in an airtight freezer-safe container with parchment paper between layers for up to 2 months. Thaw overnight in the refrigerator.
-
Scaling: For a 9 × 13-inch baking pan, increase the ingredients by 1.5 times. The brownies will be somewhat thinner, so check the visual doneness cues rather than relying on the original baking time.


Leave a Reply