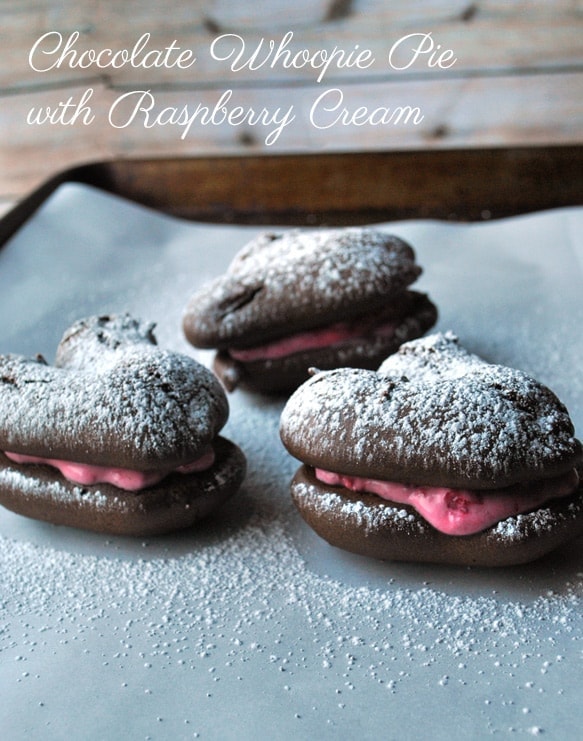
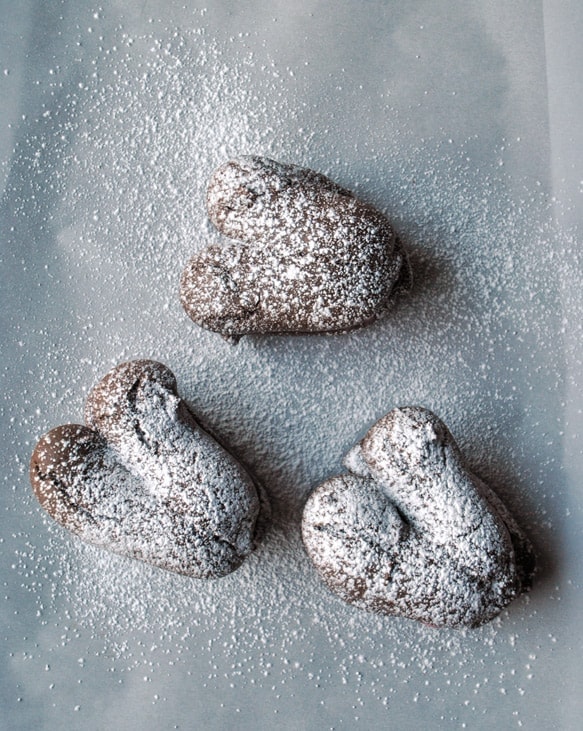
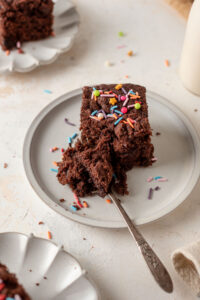
Simply irresistible chocolate whoopie pies filled with a fresh raspberry cream. Turn these into heart-shaped whoopie pies for a simple and tasty romantic dessert!
I love discovering new desserts. Believe it or not, I only discovered whoopie pies within the last couple of months. Sure, I've heard of them, but I never had the pleasure of trying one. They were phenomenal, but how can you go wrong with two little cakes with cream filling, right? Consider me a chocolate whoopie pie convert!
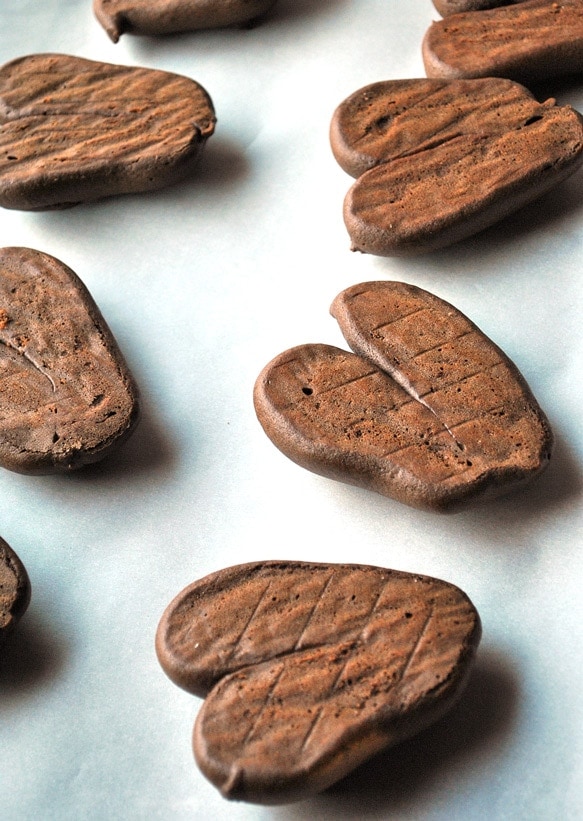
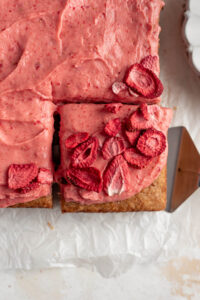
With Valentine's Day around the corner, I decided to try to make them a little festive by piping these chocolate whoopie pies into heart shapes. It took me a while, but I finally got the hang of it. I wish I took a few shots of my first batch - they were beyond ridiculous! The trick is to cut a wider hole in your pastry bag and keep the "V" shape relatively closed in. I tried to be clever and use one continuous line to make the "V" shape, but it ended up looking more like a "U" and the batter would never merge to form the heart. The best thing to do is work from the bottom up. So make the first line going from the bottom up to the left, then another line from the bottom to the right. Leave about an inch of space between the two lines.
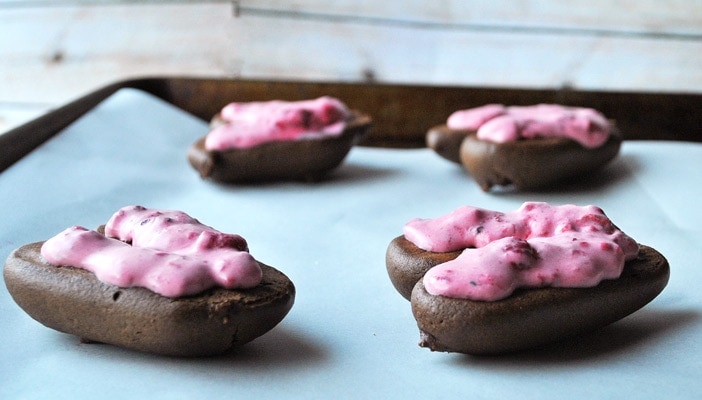
My original idea was to do a champagne-raspberry cream filling, but I just could not get the consistency right. I decided to nix the champagne and try to figure that out another day because nothing I did seemed to work. The cream filling was still incredibly delicious sans alcohol as it was light, creamy and fruity. I may or may not have eaten the leftovers with a spoon. I usually like to use fresh ingredients, but frozen berries work well because all their beautiful juices come out when they thaw. I recommend using a mixture of both fresh and frozen so that the cream doesn't get too watered down.
These chocolate whoopie pies are best served fresh due to the raspberry cream. If you want to do some prep ahead, you can make the whoopie pies the night before and store in an airtight container.
Recipe Card

Chocolate Whoopie Pies with Fresh Raspberry Cream
Ingredients
- 2 cups 250 g all purpose flour
- ½ cup 41 g cocoa powder
- 1 teaspoon baking powder
- ½ teaspoon salt
- ½ cup 100 g sugar
- ½ cup 100 g packed light brown sugar, plus ¼ cup (50 g) for cream
- ½ cup 114 g Greek yogurt (plain)
- ⅓ cup 79 mL oil (I used avocado oil, but any will do)
- 3 large eggs room temperature
- 1 ½ teaspoon vanilla extract
- ¾ cup 177 mL heavy cream
- ½ cup 125 g fresh raspberries
- ½ cup 125 g frozen raspberries (optionally use 1 cup fresh raspberries)
- ⅓ cup 40 g powdered sugar (optional)
Instructions
- Preheat the oven to 350 degrees and place parchment paper on baking sheets.
- Mix the flour, cocoa powder, baking powder and salt in a medium bowl. Set aside.
- Mix the white sugar plus the ½ cup (100 g) light brown sugar, yogurt, oil, eggs, and 1 teaspoon of vanilla in a bowl using an electric mixer for about 5 minutes.
- Add the flour half a cup at a time to the wet ingredients while the mixer is still on. Scrape the sides of the bowl as needed. Mix until smooth and creamy.
- Refrigerate the batter for about 30 minutes.
- Transfer the batter to a disposable pastry bag or large sandwich bag and cut out the corner, leaving a ½ inch hole.
- Create a "V" shape with the batter.
- Bake for about 8 - 10 minutes and let cool on a wire rack.
- Beat the heavy cream and ¼ cup (50 g) brown sugar on medium until it forms peaks. Add ½ teaspoon vanilla.
- While it is mixing, gently mash the raspberries.
- Fill another pastry bag with the raspberry cream filling and cream half the cakes. Sandwhich them with the remaining cakes.
- Finish with a sprinkling of powdered sugar on top.


Tabitha Drugan says
I have made these several times and they are amazing. The first time I made them they looked kind of sad but tasted amazing. I have made a truffle out of them I just made the cakes let them cool broke them up in a bowl and mix,ed raspberry cream in it was good, and I have added extra chocolate into the cakes. They are fun to play with it If you try them the way the recipe is written you will never want another whoopie pie again. These really are great and not hard to make. Give them a try you won't be disappointed I promise. If my 92 year old nana likes them everyone will.
Lisa@ Cooking with Curls says
Those are gorgeous Amanda, and look delicious!! I have never eaten or made a whoopie pie in my life....I think I should change that! 🙂
Tammy @ creativekkids.com says
These look so yummy! I will pin them--I also have a Valentine's linky on my Valentine Seven Layer Bars.
Amanda says
Thanks for the heads up, I am going to check it out. Thank you for stopping by!
Parrish (Life With The Crust Cut Off) says
These look gorgeous and yummy!!!