
I love a good sugar cookie, but making them with brown butter takes them to a whole new level. You get this amazing nutty, almost caramel flavor, soft and chewy centers, and a little crunch around the edges from the sugar coating.
And the best part? No rolling pins, cookie cutters, or decorating needed! They're the kind of cookies I love adding to a holiday cookie box, but they're just as good when you want something sweet without making a big project out of it.
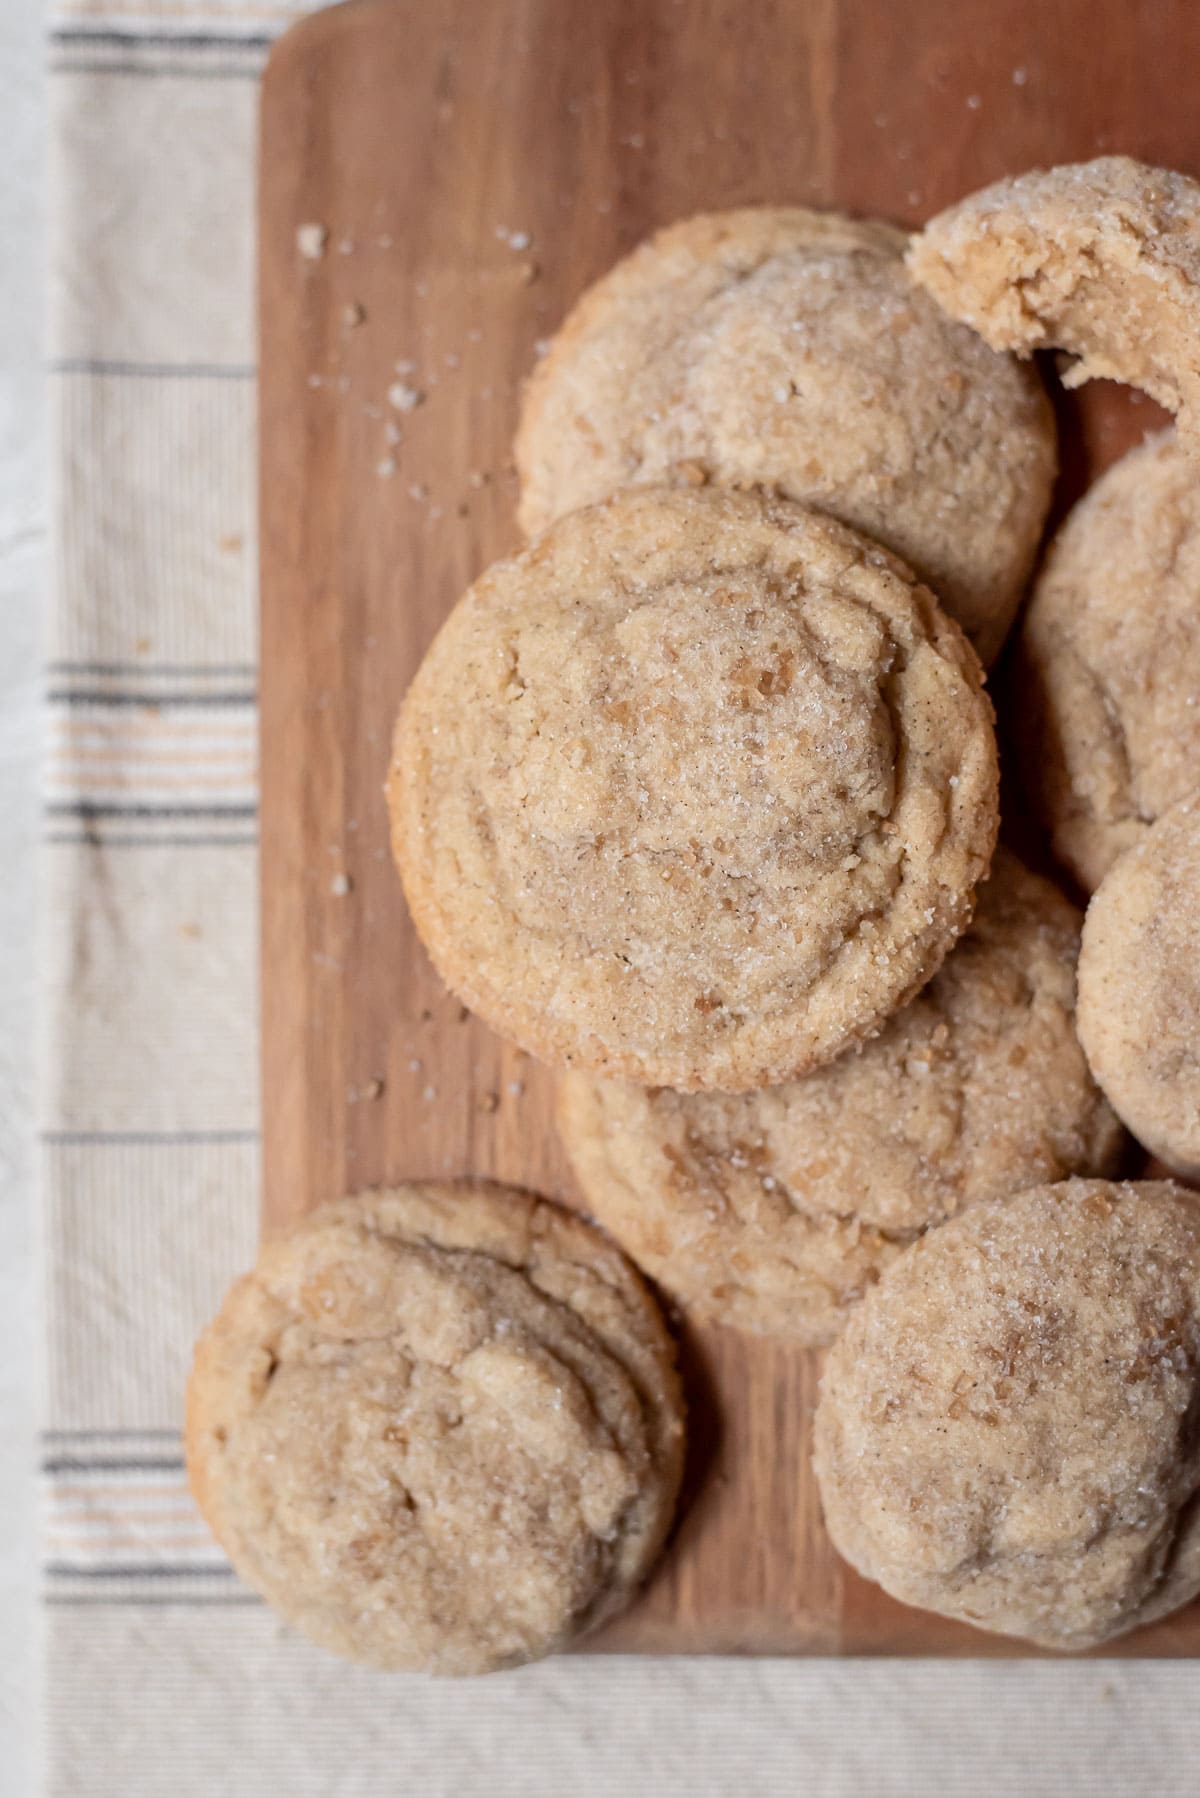
Why You'll Love These Brown Butter Sugar Cookies
These started with the classic sugar cookies from my cookbook, Cookie School. I was also inspired by my chocolate chipless cookies, which are a great reminder of just how much flavor browned butter adds to a cookie. If you want to go all in on the chocolate, my brown butter chocolate chip cookies are another favorite.
- No rolling pins or cookie cutters! Just scoop the dough, roll it in sugar, and bake. You get beautiful cookies without all the decorating.
- Incredible brown butter flavor. Browning the butter adds that rich, almost caramel-like flavor that makes these so much better than your average sugar cookie.
- Soft and chewy with crisp edges. My favorite combination! The sugar coating gives each cookie just a little extra crunch.
- Great for making ahead. I love chilling the dough overnight for the best flavor, then baking whenever I'm ready to put together my cookie boxes.
My biggest tip is to keep an eye on your butter while it browns. Once it starts smelling nutty, things happen quickly, and you don't want it to burn.
Key Ingredients
The ingredients are pretty straightforward, but there are a few things I'd pay extra attention to. You'll find the full list and measurements in the recipe card below.

- Butter: I recommend using the best-quality unsalted butter you can afford because the flavor really shines through in these cookies. Measure the full 1¼ cups before browning it. Some of the water will evaporate, and that's okay. Just make sure you scrape all those delicious brown bits into the mixing bowl, too.
- Granulated and brown sugar: Granulated sugar helps give the cookies lightly crisp edges, while brown sugar adds a little moisture, chew, and caramel flavor. If you run out, I have a tutorial for homemade brown sugar.
- Flour: Please be careful when measuring your flour! Too much can leave you with dry cookies that don't spread properly. I recommend using a kitchen scale to weigh 300 g of all-purpose flour for this recipe. If you're using cups, give the flour a quick fluff, spoon it into your measuring cup, then sweep off the excess.
- Cornstarch: Helps keep the centers tender and slightly thicker. You can omit it if needed, although the texture may change a little.
- Baking powder and salt: A little baking powder provides lift; the salt balances the sweetness and brings out the browned-butter flavor.
- Egg and pure vanilla extract: A room-temperature egg blends more easily with the creamed butter and sugars. Vanilla enhances the other flavors.
- Sugar for rolling: Granulated sugar gives each cookie a crisp, sparkly coating. I also like using a mixture of granulated and turbinado sugar when I want a little more crunch.
And don't worry about adding water or milk to replace what cooks off while the butter browns. Just use the amounts in the recipe card and you'll be good to go.
How to Brown Butter for These Cookies
If you've never browned butter before, don't let it intimidate you. It's really easy once you know what to look for, although it can go from perfectly nutty to burnt in a matter of seconds! I have a whole guide to making brown butter with extra photos if you need a little help.
- Melt the butter. Put the cubed butter in a medium, heavy-bottomed saucepan over medium heat. A light-colored pan makes it easier to see the color change.
- Keep stirring. The butter will melt, bubble, and foam as its water cooks off. Scrape the bottom to keep the milk solids moving.
- Watch for brown flecks and a nutty smell. The butter should turn golden amber with distinctly brown specks at the bottom. Once it smells nutty, you're close; it can burn quickly.
- Transfer it out of the pan. Pour the butter and all its toasted bits into a heatproof bowl right away so the hot saucepan doesn't keep cooking it.
- Cool until soft and spreadable. Let it cool and thicken until it is no longer liquid, but still soft enough to cream with sugar. You can refrigerate it briefly to speed this up; if it hardens, let it soften again before mixing.
What if it burns? The milk solids should be brown, not black, and the aroma should be nutty rather than bitter or acrid. If it has scorched, start with fresh butter rather than using it in the dough.
How to Make Brown Butter Sugar Cookies
Once your browned butter cools, making the dough is just like making any other drop cookie. You can bake them the same day, but you know me, I'm always going to recommend an overnight chill if you can manage it!
- Brown and cool the butter. Follow the instructions above, then let it reach a soft, spreadable consistency, rather than using it while still liquid.
- Combine the dry ingredients. Whisk the flour, cornstarch, baking powder, and salt together in a medium bowl.
- Cream the butter and sugars. Beat the cooled browned butter, granulated sugar, brown sugar, and vanilla with a stand mixer and paddle attachment or a hand mixer until light and fluffy, about 3–4 minutes. Scrape down the bowl.

- Add the egg. Beat for another 1–2 minutes until fully incorporated, scraping the bowl again.
- Add the dry ingredients. Mix on low speed or fold with a rubber spatula just until there are no dry streaks of flour. Stop as soon as the dough comes together.
- Chill the dough. Cover and refrigerate for at least 30 minutes if you're short on time. I recommend at least one hour, and overnight is my favorite for the best flavor and texture. You can refrigerate the dough for up to three days.
- Portion and roll. Heat the oven to 350°F (175°C) and line your baking sheets. Use a 2-ounce cookie scoop to portion the dough, roll each ball in sugar, and set them at least 2 inches apart. If the dough is very firm after a long chill, let it soften just enough to scoop.
- Bake. Bake for 10–12 minutes, or until the edges are lightly golden brown. The centers should still look soft, but not wet, and will finish setting as the cookies cool.
- Cool. Let the cookies rest on the hot baking sheet for about one minute, then transfer them to a wire rack to cool completely.


One more tip: don't put your chilled cookie dough on a baking sheet that's still hot from the last batch. It'll start melting the butter before the cookies even get into the oven.
My Best Tips for Soft, Chewy Sugar Cookies
- Measure the flour carefully. Too much is one of the most common reasons cookies turn out thick or dry. I recommend 300 grams for this recipe.
- Keep the browned bits. Those toasted milk solids add flavor, so don't strain them away.
- Cool the butter before creaming. Liquid butter won't cream the same way as softened butter. If you've chilled it until hard, let it soften first.
- Don't skip chilling the dough. Thirty minutes will do if you can't wait, but I recommend at least an hour. Overnight is what I prefer, and you can leave it in the refrigerator for up to three days.
- Use a room-temperature egg. It incorporates more easily. To warm a cold egg, place it uncracked in a bowl of warm (not hot) water for several minutes.
- Stop mixing once the flour disappears. Overmixing after adding the flour can make the cookies tougher.
- Watch the edges. Remove the cookies when the edges are lightly golden, even if the middles still look soft.
Cookies not spreading? Check how you measured your flour and whether the dough was especially cold going into the oven. If it's very hard after an overnight chill, let it soften slightly before scooping.
Cookies spreading too much? Make sure you didn't cream the sugars with butter that was still liquid, give the dough its full chill time, and use a cool baking sheet for every batch.
Variations
I think these are pretty amazing as they are, but there are so many ways you can change them up if you're in the mood to experiment.
- Maple pecan: Add ¼ teaspoon maple extract and ¾ cup chopped pecans for an autumn-inspired cookie.
- Spiced sugar: Mix a little pumpkin spice mix or chai spice mix into the sugar used to roll the dough.
- Festive sprinkles: Roll the dough in colorful sprinkles instead of sugar to suit the occasion.
- More cinnamon flavor: If you love browned butter with cinnamon sugar, try my brown butter snickerdoodle cookies.
Just remember that these are drop cookies, so I wouldn't try using cookie cutters with this dough. If you want to make shapes for decorating, my roll out sugar cookies are the ones to use. If you'd rather skip the cutters but still want frosting and sprinkles, try my sugar cookie bars.
Storage and Make-Ahead Instructions
I almost always make the dough a day ahead. It makes baking day so much easier, and I love the flavor after it's had time to rest in the fridge.
- Refrigerated dough: Cover the bowl or place portioned dough in an airtight container in the refrigerator for up to three days. A 30-minute chill is the minimum for same-day baking, but I recommend at least one hour and prefer overnight.
- Frozen dough: Portion the dough and freeze on a lined baking sheet until firm, then transfer to an airtight freezer container for up to one month. If you want to stick to the baking time in the recipe card, thaw the dough in the refrigerator before rolling it in sugar and baking. I like to let the dough chill overnight before freezing it so the flavor has time to develop.
- Baked cookies: Let them cool completely, then store in an airtight container at room temperature for up to five days.
- Freezing baked cookies: Freeze fully cooled cookies in an airtight freezer container, with parchment between layers, for up to one month. Thaw covered at room temperature.
Using Them in Holiday Cookie Boxes
These are definitely ones I'd make room for in a holiday cookie box. They're simple enough to go with just about anything. I love pairing them with my chewy molasses cookies, chocolate peppermint cookies, or snowball cookies for a nice mix of flavors and textures.
Let the cookies cool completely before packaging and separate layers with parchment to protect the sugar coating.

FAQs
There are a few reasons this can happen. You may have accidentally added too much flour to your cookies, which is a risk if you do not give your flour a quick fluff before measuring. Your cookie dough may also be too cold, which can happen if your kitchen is particularly chilly. Typically the cookies have warmed enough by the time you portion them out and then roll in sugar. Give them another 5 minutes before putting them in the oven.
Yes, you should be able to bake the entirety of the dough in a parchment-lined 9-inch springform pan. You will need to adjust the baking time and add a few minutes. I recommend checking at the regular baking time and then checking after a few minutes for browning. The edges should be golden brown and the middle should be puffy. The very center may look underbaked, and that is okay. If the edges are too brown, but the middle looks too underbaked, you can turn the oven down to 325F and cover the top with aluminum foil.
Recipe Card

Brown Butter Sugar Cookies
Ingredients
- 1 ¼ cups unsalted butter room temperature
- 2 ½ cups all-purpose flour
- 2 teaspoons cornstarch
- ½ teaspoon baking powder
- ½ teaspoon sea salt
- 1 cup granulated sugar
- ¼ cup brown sugar
- 1 teaspoon vanilla extract
- 1 large egg room temperature
- ⅓ cup sugar for rolling

Instructions
- Brown the butter. Cut the butter into cubes and place in a medium, heavy-bottomed saucepan over medium heat. Cook, stirring constantly, as the butter melts, bubbles, and begins to foam. Watch for the milk solids at the bottom to turn brown and for the butter to develop a nutty aroma. Remove from the heat immediately and transfer the butter, including all the browned bits, to a heatproof bowl.
- Cool the browned butter. Allow the butter to cool to room temperature and thicken until soft and spreadable. It should no longer be liquid, but it shouldn't be hard either. You can briefly refrigerate or freeze it to speed up cooling, checking frequently.
- Combine the dry ingredients. Whisk together the flour, cornstarch, baking powder, and salt in a medium bowl. Set aside.
- Cream the butter and sugars. Add the cooled browned butter, granulated sugar, brown sugar, and vanilla extract to the bowl of a stand mixer fitted with the paddle attachment, or use a large bowl and hand mixer. Beat on medium-high speed for 3–4 minutes, until light and fluffy. Scrape the sides and bottom of the bowl as needed.
- Add the egg. Beat in the room-temperature egg for another 1–2 minutes, until fully incorporated. Scrape the bowl again as needed.
- Mix in the flour. Add the dry ingredients and mix on low speed, or fold them in by hand using a rubber spatula. Mix only until there are no streaks of flour remaining, scraping the sides and bottom of the bowl as necessary.
- Chill the dough. Cover the bowl and refrigerate for a minimum of 30 minutes. I recommend at least 1 hour, but preferably overnight for the best flavor and texture. You can refrigerate the dough for up to 3 days.
- Prepare the oven and baking sheets. Preheat the oven to 350°F (175°C). Line baking sheets with parchment paper or silicone baking mats. If the dough has chilled overnight and is very firm, let it sit at room temperature for a few minutes so it's easier to scoop.
- Portion and coat the dough. Use a 2-ounce cookie scoop to portion the dough. Roll each portion in the additional granulated sugar until coated, then place the dough balls at least 2 inches apart on the prepared baking sheets.
- Bake the cookies. Bake for 10–12 minutes, or until the edges are light golden brown. The centers should still look soft, but not wet. They will continue setting as they cool.
- Cool the cookies. Allow the cookies to rest on the baking sheet for 1 minute before carefully transferring them to a wire rack to cool completely.
Notes
-
Keep the browned bits. The toasted milk solids contain much of the brown butter flavor, so scrape them into your mixing bowl instead of discarding them.
-
Cool the butter properly. It should be soft and spreadable before you cream it with the sugars. You can speed up cooling in the refrigerator or freezer for approximately 10–25 minutes, checking frequently. If it becomes too hard, allow it to soften before mixing.
-
Measure the flour carefully. I recommend using 300 g of all-purpose flour. Too much flour can prevent the cookies from spreading properly.
-
Chill the dough. A 30-minute chill works if you're short on time, but I recommend at least 1 hour. Overnight gives the best flavor and texture, and the dough can be refrigerated for up to 3 days.
-
Use cool baking sheets. Avoid placing chilled dough onto a hot baking sheet, which can cause the butter to start melting before baking.
-
Watch for lightly golden edges. The centers should still look soft when the cookies come out of the oven. Don't wait until the entire cookie appears firm.
-
Freezing the dough: For the best flavor, chill the dough overnight before freezing. Freeze portioned dough for up to one month. Thaw in the refrigerator before rolling in sugar and baking if you want to follow the original baking time.
-
Storage: Store baked cookies in an airtight container at room temperature for up to 5 days, or freeze for up to one month.


Leave a Reply